Hayward Perflex D.E Filter Repair & Troubleshooting
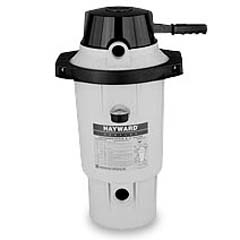
Hayward Swimming Pool Products makes a D.E. pool filter called the Perflex EC-Series Swimming Pool Filter. They make a few different sizes of this Perflex pool filter. The different names of the EC filters are the EC-30, The EC-40, The EC-50 and The EC-65, which is the largest model of the EC-SERIES line.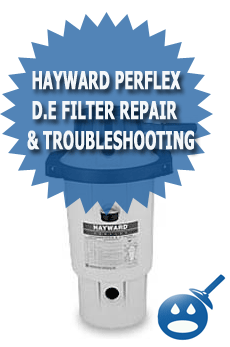
You will find the Perflex EC-30/40 on many above ground swimming pools. You will find the larger models of the Perflex(EC-50/65), on many in-ground swimming pools. You will also find some EC-50/65 Perflex models can also be used on large above ground swimming pools. The Hayward Perflex EC40 swimming pool filter and other models of this Hayward pool filter have been installed into many backyards over the last 25 years and many will soon need repair or currently do. There are three different models of this filter but rebuilding and troubleshooting them is all basically the same as they all use commonly designed parts.
Many of the things that break on these types of swimming pool filters are actually caused by overuse or neglected repair to the pool filter. Some parts will just have to be replaced because of old age or just normal weathering. Hayward makes many replacement parts for the EC Perflex filter line so there is no need to worry about finding or buying replacement parts. You will only need a few common tools to be able to take apart and fully rebuild or repair your EC30, EC40, EC50 or EC65 swimming pool filter. You will need a basic standard socket set, a flathead screw driver, an open-end crescent wrench and a garden hose to wash the filter. You will also need some Teflon sealant tape to wrap around a few fittings and threads. If you have any broken fittings in your filter, you then will also need a small hammer.
If you know what part is already broken on your filter then you can just use this guide to repair the problem with your Perflex pool filter. If you have no idea what is wrong with the filter you can use the Hayward Perflex troubleshooting guide on the bottom of this page to help you figure out what parts you need to change. You will also always want to clean all the parts pf the swimming pool filter as you are working with them. There is no reason to work on a filter that caked up with dirty D.E powder. Always work safe and clean when working on your pool filter.
Most Common Hayward Perflex Pool Filter Problems w/Solutions:
Below you will find many common problems with easy to read DIY Pool Repair guides for the Hayward Perflex EC-Series filter. Most of these repairs can be done by the average person with a small set of tools. If you feel you can not do the repairs yourself for any reason, you can always call a swimming pool service professional to repair the problem for you. You can also bring your filter to many swimming pool repair centers to have them fix it for you.
How To Replace A Broken Hayward EC Pool Filter Gauge:
If your filter gauge on your filter is broken or cracked then you will need to replace it with a new one. Replacing the gauge on the EC40 or another EC Perflex filter requires just a few steps.
The first thing you will want to do is to buy a new replacement gauge for the Hayward EC filter that you are working on. Once you have the new gauge you can remove the gauge one of two different ways. The first way is to carefully grab the gauge with your hands and spin the gauge counter clockwise until it’s all the way out. If the gauge is tightened a lot you will have to use the other method to remove the gauge. This method would be to use an open-end wrench or a crescent wrench to remove the gauge from the filter.
Just on top of the gauge threads you will see a square that is made from the brass that the threads are. You can attach your wrench to that square and then turn the gauge counter clockwise to remove it. Once the gauge is removed you will want to install the new EC filter gauge. Before you screw the new gauge into the filter you will want to wrap the filter gauge threads a few times with some Teflon tape so that the gauge doesn’t leak. Once you wrap the Hayward EC swimming pool filter gauge a few times with the tape you can screw it back into the pool filter. Once you have hand tightened the filter gauge back into the filter you can use your wrench that you removed the gauge with to tighten the gauge all the way. Be sure to be careful as the gauge stem is made from brass and the filter is made from plastic. If you over tighten the gauge you cab crack the filter housing.
How To Repair The Hayward EC-Series Pool Filter Bump Handle:
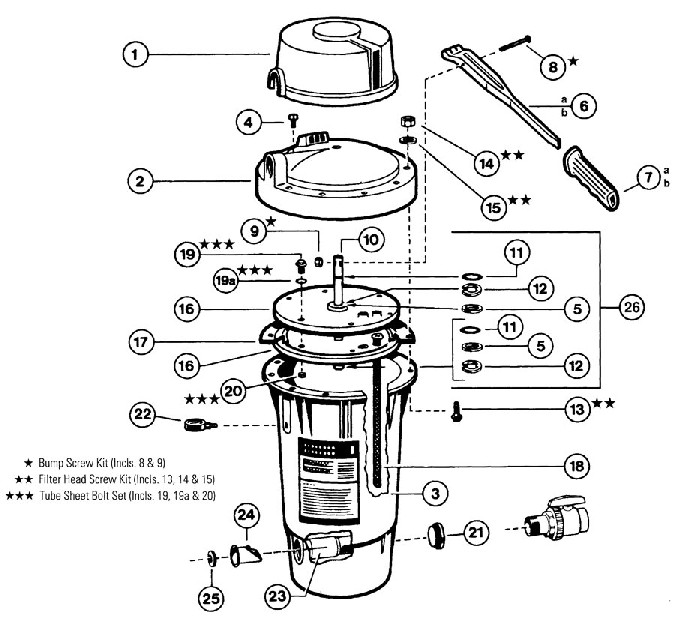
What makes the Hayward EC-series filter so unique is the way it works with the “bump handle” or D.E. media regeneration handle. This handle is used to regenerate the D.E. filter media as well as to shake off all of the D.E. from the fingers when its time to backwash. Sometimes this bump handle will break off from old age or when someone forces the handle down too fast when using it. When this happens you will need to replace the EC series bump handle with a new one.
In order to replace the bump handle on the Hayward EC65 or other sizes is to first remove the bump handle grip. This is the grip that is at the end of the handle itself. If you have a yellow tank EC filter you will just pull off the grip, as it is probably a runner one. If you have a new Hayward EC pool filter you will have a black hard plastic grip that will have a push tab at the end of it that you will have to push over. Once you push over the tab you will pull the grip off of the bump handle and then you can slide it on to your replacement Hayward EC filter bump handle.
Now that you have replaced the grip on the handle you will want to remove the cracked or broken handle from your Hayward Swimming Pool Filter. To do so you will have to remove to nuts and bolts that go through this handle. One bolt will go through the plastic top of the filter and this bolt is found at the end of the handle. The other bolt will go through the bump handle and the tube sheet bump shaft; this bolt will be at the center of the handle. You can remove both bolts with a Flathead screw driver and an open-end crescent wrench.
Once you have removed the two bolts you can remove the handle from the top of the Hayward Perflex Pool Filter tank. Now you will want to replace the handle with the new bump handle. To do so align the holes on the bump handle with the holes at on the filter tank and then push the bolt through. Once the bolt is through tighten down the nut clockwise a few turns. Once you have the first bolt in you will want to insert the second bolt through the bump handle and then through the bump shaft. Once the bolt is through you can fully tighten down both bolts and your new handle install will be complete.
How To Replace Cracked Tube Sheets:
If you look inside of the EC-series line of swimming pool filters from Hayward is something called “Tube Sheets” and something else called “filter fingers”. The tube sheets are pieces of round plastic that have many holes inside of them to hold the filter fingers. There are two different tube sheets inside of the filter. There is a top tube sheet and a bottom tube sheet. Often these tube sheets crack from pushing on the bump handle to hard. When the tube sheets crack they will allow D.E. powder back into the pool when running.
To replace the tube sheets you will have to remove all of the bolts hold the top of the EC tank lid to the body of the filter. In older models you will find lots of bolts that hold on he top and in new EC-40, 50 and 65 models you will find a single bolt that is connected to collar that holds the filter together. Once you remove the top of the filter you will be able to take off the top and see the fingers and tube sheets.
Now that you have the top off you will want to remove the center bolt from the bump handle that is connected through the stainless bump shaft that also goes through the tube sheets. Once you remove this though bolt you can pull the tube sheets and fingers from the filter top. You will now want to start removing all the small 5/16 bolts around the edges of the tube sheets and once you do the top tube sheet will separate from the bottom.
Once you do this you will have to remove two c-clips. One from the bottom of the tube sheet and one from t he top. It is easier to do the one on the top first and then you can slide the shaft through the tube sheets and remove the other one. It is always best to replace the c-clips in the perflex when you are changing the tube sheets.
When you remove the top tube sheet you will also have to be careful that you do not loose or damage the rubber tube sheet tank gasket. You will have to re-use this gasket when you put the filter back together unless you bought a new one when you bought the tube sheets. If you have not started yet or have not put the filter back together yet you can also ways got out and buy a tube sheet tank gasket.
Once you have removed the top tube sheet you can start to pull all of the fingers out of the lower tube sheet and put them into the new tube sheet. You will want to clean the fingers first also before putting them into the new tube sheet. Once you have removed all of the fingers from the cracked lower tube sheet you can now line up the holes in the rubber tube sheet gasket with the lower tube sheet and then re-bolt on the
Now that the fingers are in the new lower tube sheet and the tube sheets are bolted back together you can stick the bump shaft back through the top of the filter. Once the bump shaft is through the top of the filter you can re-insert the long bolt that goes through the bump handle that you removed when disassembling the filter.
If you now have the filter all together you can line up your discharge fitting with your pool hoses or pipes and re-bolt down the top of the filter to the tank. If you have an old Hayward EC series filter with multiple bolts in the top you will want to make sure to tighten them down evenly to prevent leaks.
How To Repair Hayward Perflex Leaking Bump Shaft Seal:
On the bump shaft on the Hayward Perflex you will see two different o-rings. These o-rings are made from rubber and stop the water from leaking through the bump shaft, From time to time these o-rings will have to be replaced. If you see water leaking from your bump shaft on your Perflex filter then you will need to replace your o-rings.
To replace the o-rings you will need to disconnect the pump handle and remove the bolts of the bellyband from the filter tank top. Once you have done so you will be able to remove the inner filter assembly out from the filter top. Now that the bump shaft is exposed you can remove the o-rings if they are still on the shaft. Sometimes the o-rings get so old they just fall off and go out the backwash line. If this is the case you will not have to worry about removing them.
Once the old o-rings are removed from the bump shaft you will want to grease up the shaft with some lubricant and then slide the new or-rings onto the shaft and into the grooves. There will be an upper and a lower groove in the shaft for the o-rings to sit into. Once they are sitting into place correctly you will want to grease them again and then slide the bump shaft back through the top of the filter and then reattach the bump handle to the shaft.
Now that the filter assembly is reconnected to the top of the filter tank you can bolt the top of the filter tank on to the bottom of the filter tank using your bolts or bellyband. Depending on how old your Hayward EC filter is will determine if you have a bellyband or a bolt pattern. The older Yellow Perflex tanks had a bolt pattern with many bolts. The newer Gray Perflex tanks now have a bellyband with just one bolt you will have to remove or tighten.
How To Replace A Leaking, Stuck Or Broken Backwash Valve:
The standard backwash valve on the Hayward Perflex is actually made by Hayward and can be replaced easily with a few minutes of your time and of course a new replacement Hayward Perflex Backwash valve is required. Before you can change the valve you will want to backwash your swimming pool filter and then drain it by leaving the backwash valve open until all of the water comes out. If you are working on an above ground swimming pool you will need to plug the swimming pool returns and skimmer or shut the filter isolation valves so that the pool water does not keep filling the filter.
Once the pool filter is back washed and drained you can remove the backwash valve by turning it counter clockwise. If you have a backwash line attached to the backwash valve you will want to remove that first. This may also require you to move the backwash fitting from the old valve. It will take 5 – 8 complete 360-degree spins or so before the valve becomes free. Once the valve is removed you will have to replace it with your new Hayward Perflex Backwash Valve.
You will now want to wrap the backwash valves threads with a few wraps of Teflon Tape before installing the valve. Once you have applied the Teflon tape you can tighten the new backwash line into place. If you had a backwash hose hooked up to the old valve you can now hook your backwash line on to your new backwash valve.
Now that the new backwash valve is installed you will want to put the valve in the off position and remove the plugs from the filter and the return jets if you were working on an above ground pool. You can now start your filter back up and re-add your D.E. powder. If you see any small drips or leaks from the new valve, shut off the filter and tighten the valve a bit more.
Hayward Perflex EC-Series Pool Filter Troubleshooting:
Problem: “My Perflex Pool Filter is leaking from the bump shaft”
Solution: You will have to replace the o-rings that are on the bump shaft. They are either worn or missing and this is why the shaft is leaking on your Hayward Perflex Filter.
Problem: “How Do I tell How Old My Perflex Filter Is?”
Solution: Hayward made the tanks on the EC-series Yellow for many years, so if you have a yellow tank you have an older filter. If your tank is gray you have a new Hayward Perflex Pool Filter.
Problem: “My backwash valve is still leaking after I have shut it off”
Solution: You can screw in a plug with an o-ring into the end of the backwash line as a temporary fix until you get a new backwash valve.
Problem: “How Do I bleed the air from my Perflex Filter?”
Solution: You can bleed the air our using the air relief screw on top of the filter.
Problem: “When I push my bump handle up and down it feels like its not working and really loose, what is wrong?”
Solution: When you push the bump handle up and down and it feelslike nothing is working it usually means that one of the c-clips that are connected to the bump shaft has broken and now the shaft can not push the tube sheets up and down. You will need to replace both the upper and lower bump shaft c-clips.

Sorry, yes hayward super pump. Above ground pool.
Hi Kevin,
OK, If the system runs well when vacuuming, then it has to be the vacuum equipment or operator error.
Check all hoses for leaks.
Also, how are you priming the pool hose. A bad prime will give you issues.
The BEST way to prime the pool hose is to attach the swivel end to the vac head and then put the vac head in the water and then take the pool hose and push it straight down 6 inches at a time till you reach the end,
Once you reach the end you will see a gush of water push out of the end and the vac hose will be 100% air free,
I have seen many people prime the hose using the pool returns / jets and that does NOT work will. Try my method if you have not done so,
Also make sure you have a vacuum disk that has a rubber seal on the bottom,
You are using a vacuum disk right?
Joseph
OK, I’m now priming the hose by submersion, ( I had been using the return jet), and I found out there was a split at one end of the hose going to the pump. I fixed the hose,( it was really minor), but my problem has not improved at all. There is alot of air, maybe more than when I first opened the pool, in the system. I can hear the air churning around in the filter tank, and spitting out of the return jet. Even so, it still filters well, but when I vacume, there is little suction at the vacume head. My skimmer basket is from doughboy, and to vacume I drop the skimmer cover bolow the water-line where it seats on a shelf just above the basket. It does not have a rubber gasket, and is designed to seal water-tight without one. There are no cracks in the lid, and I do not see any air passing through it.
Hi Kevin,
Let me know how it works when you prime the hose as I described,
I think you will have better results,
Joseph
As I said, no improvement.
Kevin.,
When you run the filter with our vacuuming you have no air in your system> Did I catch that right?
Joseph
Well, it finally occured to be to set it up in vacume mode, but without the vacume attached. It draws tons of water, so the problem must have been the hose all along. Unbelievable since this is a new hose right out of the box. I’m going to buy another new one, I’ll let you know if this works or not.
Hey Kevin.
I agree with you, I would try another hose.
If the “system” is air free when not vacuuming the issue for sure is in the hose / equipment,
Let me know how you make out,
Joseph
Bought a new hose today, same result as before. When vacuming, the water is not coming in fast enough to keep the pump primed, and it quits working completely. There is some air in the system even when filtering, I can here it in the tank, and see bubbles coming out of the return, but it only loses suction when vacuming.
Hi Joseph,
I really commend you effort in helping all of us out here. I am a newbie, dealing with pool for the first time in my life. I have 18X36 inground pool and have been trying to get it running properly from past 3 days. Now water is all clear. I have EC 65. On Sunday morning I tried few things with my filter. Unknowingly I put couple of lbs of DE in the filter and tried to run is for few hours followed it by back washing filter. Then again added 1-2 lbs of DE in the afternoon, vacumed and let it run. By the time it was evening I again saw dirt in the pool (seemed like as if it came from return jets). I also noticed that pressure was as high as 25, and filter and pump didn’t seem to be working (very less water was comming from return jets). I again pushed all dirt to the center of the pool and this time realized that I was putting too little of DE, back washed again and added 6lbs of DE as said on the filter. Pool got all clear quickly and all dirt was removed. Since i had filter running from past 2 days I shut it off for the night. Looked at the pool today morning every thing looked pretty good. I turned on filter this morning and went back to pool after 3 hours, saw there was again dirt in the pool and by the evening realized that filter was at 25psi and water was diripping from the top, skimmer looked like running but very weak, did’nt even drag chlorine floater towards it, return jets were not bringing much water into pool either. Please suggest what to do?
Brin
Hi Brin,
Here are some steps and some articles to help you
Before you open the swimming pool you might want to read:
How To Prevent Swimming Pool Opening Damage
1)You will need to get the pump and filter going.You will need to prime the pump.
If you have a Hayward Super Pump This article will show you how to prime it:
Hayward Super Pump Repair Guide – http://wetheadmedia.com/hayward-super-pump-repair-guide/
2) Once you get the pump running you will need to shock the pool heavy:
Here are some articles about shocking your pool:
How To Shock Your Swimming Pool – http://wetheadmedia.com/how-to-shock-your-swimming-pool/
Liquid Vs Powdered Swimming Pool Shock – http://wetheadmedia.com/liquid-vs-powdered-swimming-pool-shock/
Swimming Pool Shock Buyers Guide – http://wetheadmedia.com/swimming-pool-shock-buyers-guide/
3) Next You will need to learn how to clear a green pool and you can find that article here:
Top Five Ways To Clear A Green Swimming Pool – http://wetheadmedia.com/how-to-clean-a-green-pool/
4) You will need to adjust your PH and ALK, This article shows you how:
Use Baking Soda In Your Swimming Pool – http://wetheadmedia.com/use-baking-soda-in-your-swimming-pool/
5) You will need to learn how to back wash your pool filter:
Complete Back washing Guide For D.E. Pool Filters -http://wetheadmedia.com/complete-back-washing-guide-for-de-pool-filters/
How To Clean Hayward Grid D.E. Filters – http://wetheadmedia.com/how-to-clean-hayward-grid-de-filters/
6) And then you will need to learn how to ad DE to your pool:
How To Add DE To Your Pool – http://wetheadmedia.com/how-to-add-de-to-your-pool/
let me know if the above helps you, If you have more questions please feel free to ask.
Joseph
Also Brin,
I suggest that you completely take apart the filter and clean it , while inspecting all the fingers and the tube sheets for cracks.
And also read the links I post above, Also let me know if there is other questions, as I will be more then glad to answer them, or at least try to ;-)
Joseph
Hi Joseph,
We have a Ec 40 filter. The bump arm is very loose. My husband took the filter apart and we could not find the c-clips you say in your article. Are they on the EC 40?
We have a 24 ft round above ground pool. We get good return when it is first turned on then nothing. We can’t bump it because the arm has no pressure. The pool is clear, had a problem with algae when we first opened it but also had the bimp arm problem then too.
I appreciate your help. The filter is only 2 years old!
Nicole
Hi Nicole,
Yes, the EC40 uses the C-clips BUT what often happens is that even through they are a “grade” of stainless steel (go figure), they often “rot” and when the handle is bumped just a tad bit to hard they crack off and then get washed into the pool OR back washed out of the filter.
The good news is this is such a common problem that many pool supply stores such as Leslie’s etc sell the replacement parts,
You won’t be able to bump the handle until you replace the c-clips as they are what makes the tube sheets push up and down with the gasket.
If you do not have a local pool supply store near you, you can also buy them online, from many places and I could recommend a few if you needed.
Please let me know if you have any more questions.
Hope this helps you,
Joseph
My EC-40 was leaking DE. When I took it apart, the plates, tubes, gaskets, and o-rings all looked great, but one of the 12 sets of nuts and bolts that holds the plates together was missing, leaving a nice 3/16″ hole. This filter is only a couple years old, but it was given to me via Freecycle, so I can’t be sure that it wasn’t taken apart by the previous owner, who seemed to be the type to take very good care of his possessions. If I had to guess, I’d say this was a manufacturing defect, but I don’t recall seeing any DE in the pool before I disassembled it last fall. Maybe it was loose and came apart during the move.
Hi Craig,
If you are missing a bolt that could let the DE “squeeze” though that area. I would just visit a local hardware store and grab a replacement bolt. I would also check the filter as something could have come loose as you moved.
Let me know if you need more help,
Joseph
Joesph,
I just wanted to thank you. A c-clip was missing, now the filter works just fine!
Nicole
Hi Joseph,
Thanks for the suggestion. I see now that I wasn’t clear. I left off the fact that I had resolved the problem, too. I found a stainless steel bolt/nut/washer combination for less than $1. Yep, it cleared the problem up completely. (Pun intended)
Hi Craig,
Thats even better!!! Thats awesome that you fixed it for a $1.00!!!
If you need anything in the future let me know,
Joseph
Hi, I wish I had found this like 2 weeks ago. I have been trying to clear up my pool for 3 weeks now. I live in a rental and the landlord told me the minimum of what really had to be done. The owner of the local pool shop talked me through everything. A friend helped me take apart the unit and soaked the fingers in an acid/water mixture and the pool is all clear now. The problem I’m having now is that the filter for some reason has turned itself off and won’t turn on. I’ve checked the fuse box, the plug, and the filter and can’t figure out what’s wrong with it. It was running all day yesterday and I think maybe overheated, is there a switch or something somewhere that I can check, like on garbage disposals? I have an EC50.
Hi Faith,
Thanks for the nice words about the website.
Can you please tell me what kind of pump you have?
I know you have an EC50 but it’s actually the pump motor that isn’t running, so I need to know what brand / type of pump you have, If its a “Hayward Power Flo”…do you have a timer? Maybe a popped GFI circuit,
Also see these two articles:
(Lots of comments with TONS of information from many others as well!)
Hayward Power-Flo Troubleshooting & Repair Guide
http://wetheadmedia.com/hayward-power-flo-troubleshooting-repair-guide/
I also have a entire category called “Pool Pump Troubleshooting”
http://wetheadmedia.com/reviews/pool-pump-troubleshooting/
Here is a few other things from Hayward:
Motor Shuts OFF – Check For:
1. Undersized wiring; loose connections; etc.
2. Low voltage at motor or power drop (frequently caused by undersized wiring or extension cord use).
3. Mechanical binding and electrical overload.
NOTE: Your Hayward pump motor is equipped with an “automatic thermal overload protector.†The motor will
automatically shut off if power supply drops before heat damage can build up causing windings to burn out. The
“thermal overload protector†will allow the motor to automatically restart once the motor has cooled, provided the
power source is again up to proper levels. It will continue to cut On/Off until the problem is corrected. Be sure to
correct cause of overheating.
Motor Hums, But Does NOT Start – Check For:
1. Centrifugal switch stuck in OPEN position.
2. Binding of motor shaft.
Hope that helps as well.
Let me know if you need anything else or have more questions,
Joseph