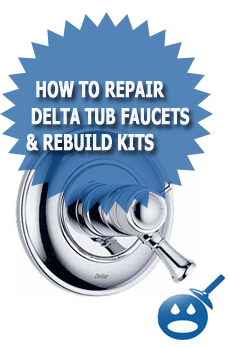
How to Repair Delta Tub Faucets & Rebuild Kits
Repairing the classic Delta tub faucets and installing the rebuilt kit is easy however, there is one part of the process that can turn a relatively easy job into an expensive, difficult job. The ball design is a simple workhorse that offers a service life unmatched by any other mixing valve and is easy to rebuild with parts available everywhere. The first step in rebuilding the Delta ball type tub/shower valve is to identify which of the two different types of balls you have in your valve. 
Place a rag over the drain to prevent any small parts you may accidentally drop from doing down the drain. Remove the cap from the handle by placing a knife blade under the cap to pop it off. Once the cap is removed from the knob you will see a screw that holds the handle on. Remove the screw and handle exposing the stem coming up from the ball. This stem will be either a round rod or a diamond shaped rod where the handle attached. You will need to get the appropriate repair kit, which will contain a “cam assembly,” which is the plastic, rubber and Teflon seal that goes in top of the ball, The ball with the appropriate shaped stem coming out of the ball, and the rubber seats and springs.

Once you have obtained the correct parts for your valve you will need to turn off the water to the valve. In some cases the valve may have integral shut of valves, which may be exposed by removing the escutcheon. The integral valves if present are small screwdriver activated valve on the sides of the valve body where the hot and cold feeds come in. I seldom bother with these unless the valve is in an apartment or, condo where the water cannot be shut off elsewhere because they often do not work and start leaking when touched. I usually do not even bother removing the escutcheon and just shut off the main water supply valve and then turn on the faucet to make sure the water is off. After shutting off the water you will need to unscrew the cap assembly.
This is the critical part where damage to the valve can occur. The valve may have 2 sections with the front valve section connected to the rear by three small tubes, which can be severely damaged being kinked or, even sheared off by twisting too hard. If this happens the valve will need replacement. If the cap assembly does not unscrew easily I heat the cap a little bit with the torch and it comes right off saving the valve below. Once the cap assembly is off I remove the cam assembly and the ball. Note how the ball has a groove that a pin from the valve body fits into, be very careful with this pin as shearing off the pin is likely to render the valve useless or, in need of a good plumber to repair it.
Once the ball is removed looking into the valve body under where the ball was you will see the two rubber seats, which I pick out with a wire, hook type tool and the springs below as well. Look at the rubber seats and springs that you removed and make sure they match the ones you have purchased. Delta valves prior to 1976 used a different design and you will need to use the proper seats and springs for the valve you have.
To reassemble the valve you will first need a small Phillips Screwdriver and you first slide the rubber seat onto the screwdriver shaft then the spring onto the shaft facing in the proper direction so you can slide them off the screwdriver into the valve in the correct orientation. Place your index finger on the seat and spring to hold it on the screwdriver the place the screwdriver into the hole where the seat and springs belong then push the seat into place with your finger. Place the 2nd seat and spring in place the same way. Put the ball in place lining up the groove in the ball with the pin in the housing, and then put the cam assembly in place with the guide peg on the cam assembly fitting into the groove on the side of the valve body.
Hold the ball and cam assembly in place while you reinstall the cap assembly and if there is a cam adjustment screw, adjust the cam adjustment screw as needed. Put the handle back on securing it with the screw and put on the crew cover. You are now ready to turn on the water and test the valve making sure that the valve shuts off properly and does not leak from under the handle.


Very good advice. I did not try to get collar off because of force required.
I don’t have a torch.
What is typical repair cost for a bathtub/shower delta type ball?