How To Repair The Shut Off Valve To A Toilet
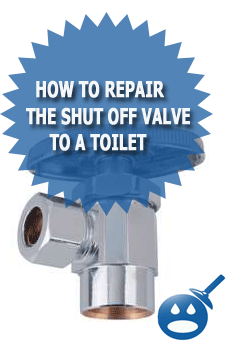
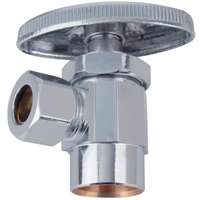
Repairing a shut off valve to a toilet while possible in some cases usually requires replacement of the valve. If the shut off valve still shuts off water to the toilet but is dripping from under the handle where the stem goes into the valve many times you can take two adjustable wrenches and with the valve in the 1/2 open position use one wrench to hold the valve in place take the second wrench place it on the first nut which is the packing/cap nut under the handle, first loosen slightly then tighten the packing/cap nut a little at a time just until the leakage stops. 
This operation will allow a small amount of water to leak out so you should place a pan under the valve to catch any leakage. Only tighten the packing/cap nut enough that the leakage stops, over-tightening will cause the valve to become very difficult to operate. Once the adjustment of the packing/cap nut is complete open the valve to the full open position but not hard against where it stops.
If the shut off valve is not shutting off or is making banging noises like a jackhammer when water flows through the valve it may be possible to fix the valve. If the valve is one of the popular brands like Brasscraft you may be able to buy an identical valve by the same manufacturer then steal the stem out of the new valve placing it in the old valve. Simply trying to replace the washer will not work because the washer does not screw into place like a typical stem but snaps in place and is an oddball size not commonly available. These shut off valves are so cheap they are not designed to be fixed.

If you are attempting to use the stem replacement method first obtain the matching valve then with the valve in the 1/2 open position on the new valve completely unscrew the packing/cap nut with a wrench, then using the handle turn the valve like you are opening it until the stem comes out of the valve. Place a pan under the old valve on the toilet to catch the small amount of water that will spill out once you disassemble the valve, shut off the main water supply valve and make sure the water is off by trying a sink faucet then take apart the failed valve in the same way you disassembled the new valve. Place the new stem into the valve and turn the handle like you are shutting the valve off, threading the stem into the old shut off valve body.
Then using your fingers thread the packing/cap nut onto the valve body and snug the valve with your fingers making sure it is not cross-threaded. Tighten the nut but not overly tight with two wrenches using the hold back method described in the paragraph above. Close the shut off valve then reopen the main valve, returning afterwards to the toilet to turn on the valve and make the final adjustment to the packing/cap nut as described in the paragraph above then open the valve all the way but not hard against the stop.
Replacing the valve depends on your plumbing skills, the existing valve, the pipe materials used and the method of attachment. You may need soldering skills if the existing valve was sweated in place. Many valves have a chrome-sleeve, which slides over a copper stub and are sweated in place. This type will require heating with a torch to remove it from the copper stub out. Other sweat valves may just be a short valve sweated on to the stub, these can be either removed by heating with a torch or cut off with a tubing cutter if the stub out is long enough. Some valves may be threaded onto a chrome or, brass nipple or, a male threaded adapter. Compression valves may also be used on copper, CPVC, Polybutylene tubing and even PEX tubing.
Some supply valves may be attached to PEX or, Polybutylene tubing directly with an expanded joint or a joint that is crimped with a ring. It is important that you have skills that can identify the material and techniques used then come up with a suitable method of replacement for the valve. In some cases specialized equipment and knowledge is required. The job may be as simple as cutting the tube and sliding on a push on valve or, you could have a serious problem that requires a lot of work. There is more to this job than can be explained in a simple article and if you don’t know exactly what you are doing you should research it further to find out what to do or, call a plumber.


I am trying to replace the plastic push on shut off valves with hose attached, that came with house when bought, have had one leaking and just don’t trust them. What is the best way to remove old push on valve, I found it very hard to twist off, finally was avle to remove it.
Hi Chuck,
Sounds like you have met the Accor Flow-Tite push on valve and supply hose.
The worst of the worst. You are right they cannot be trusted.
I would recommend replacing every one in your home with a better valve.
Accor claims they remove easily by twisting counter-clockwise.
They even claim they can be reused.
They Lie!
Johnny