Red Guard Waterproofing
Construction is a grave task which incorporates several techniques and products to create everlasting and durable buildings. To maintain optimum quality of the surfaces, it is important to make them resistant to water damages so that they look good for years. Red Guard is the trusted name in waterproofing which ensures foolproof protection of the surface area before tiles are installed. It is extensively preferred for usage in residential and commercial complexes.
What is Red Guard Waterproofing?
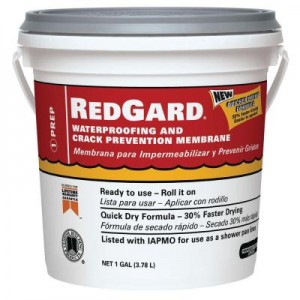
Red Guard waterproofing is a readily available elastomeric membrane which is applied prior to application of stone or tiles. This works absolutely fine for exteriors as well as interiors. It is packed with superb adhesive which creates a barrier between outside forces and the surface that can withstand cracks. Not only it gives the surfaces power to tolerate movements but by creating a moisture barrier, it also saves the surface from them. This is how it prevents cracks from developing on the tiled surfaces and keeps your floors and walls new. Some of the areas where it can be employed are:
- Below floor coverings
- Cement backerboards and concretes
- Metal drains
- Outside decks
- ABS drain assemblies
- Gypsum drywall
- Stainless steel assemblies
Advantages of using Red Guard waterproofing membrane are:
- It has a formula which instantly dries, this saves curing time.
- The ease with which it can be applied is simply outstanding. Take an airless sprayer, roller or trowel and get down to work.
- It has been rated for being heavy duty beyond expectations
- It is best used as a shower pan liner, by meeting the standard specification codes of plumbing.

Red Guard Waterproofing instructions
It is an effective way to build a tough wall with the help of the compound present in it. This quick remedy of shower walls can be installed in simple steps. Instructions which might be followed to install Red Guard over shower walls have been listed below:
- Prepare the walls for application of Red Guard membrane. Use a spray bottle and wet the walls for putting on the Red Guard.
- Take a paint brush and systematically apply coats in all the angles and corners of it. Corners are troubled areas which can be painted beforehand.
- Now, you can use a paint roller in addition with pan to spread it throughout the walls. You may elongate the roller by using an extension which will help you cover more areas.
- On application, it will appear pink but once it dries up, it will become deep red in color.
- After the first coat dries up, use a second coat on the entire surface. To know whether it has dried completely, rely on the change of color from pink to dark red.
- Use proper technique to apply the coats. Apply horizontal coats in the first go and on the second turn, use vertical coats on the surface for optimum coverage.
- Even though it is said that 2 coats are enough, you may use a third one if you desire.
- Make sure that the Red Guard doesn’t contract much to give rise to voids as it has a tendency to shrink. Apply carefully at the ridges and corners.
- Once it is dry and all set, you can put the tile on the membrane with the help of thinset mortar.
Installations of thin-set mortar have been described here:
- Place a bucket of around 5 gallon and mix water with dry mix fortified thinset mortar. Make it as much thick as required and let it set for 10 minutes at least. After that, do not mix water but mix the entire mixture again for smoothening it.
- Use a margin trowel and pour the mixture into the Red Guard membrane. An area of around 3ft by 3ft can be filled with it and then it can be spread to allow the tile to set.
- Now fix the tile on the thin-set before it dries up and allow it to remain till 24 hours. Make sure you do not tamper with it anyhow.
You can even use it for other tasks like making shower niches extra waterproof and applying at the back of backerboards as it poses difficulties in putting plastic vapor membrane.
Red Guard Waterproofing Drying time
It may take around 1 hour to 1 ½ hours to dry up completely. Change of color from pinkish to deep red will indicate complete drying of the membrane. Drying time might not be uniform as the environment where it is getting done influences it.


Can you use a pre-mixed mortar or mastic for tile over rad guard?
Can you apply RED GUARD over existing painted plaster walls and still have the waterproofing feature it provides? We are changing out claw foot tub for walk in shower. Thanx
Hey! I know this is kinda off topic however I’d figured I’d ask.
Would you be interested in trading links or maybe guest authoring a blog post or vice-versa?
My site discusses a lot of the same topics as yours and I believe
we could greatly benefit from each other. If you are interested feel free
to send me an e-mail. I look forward to hearing
from you! Terrific blog by the way!
I have learn some just right stuff here. Certainly price bookmarking for revisiting.
I wonder how so much attempt you put to create one
of these excellent informative site.
Hello mates, pleasant piece of writing and good arguments commented at this place,
I am really enjoying by these.
Whats up very cool website!! Guy .. Beautiful ..
Amazing .. I will bookmark your blog and take the feeds additionally?
I am happy to find so many helpful info right here in the publish, we
want develop extra techniques on this regard, thanks for sharing.
. . . . .