Hardwood Floor Repair
Hardwood flooring is a popular choice of flooring for both residential and commercial buildings. It is durable, low maintenance and very posh. Time, careless spills, weather conditions and interior temperature conditions around the wood flooring can cause many maladies to the lovely, shiny, crispy and cozy flooring.
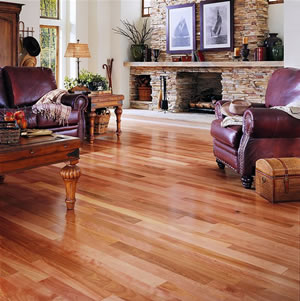
Hardwoord Floor Problems and Repair Instructions
If you are totally in love with the flooring and would consider a gazillion thoughts before replacing it then try repairing the affected area. Here we give some easy DIY ways of hardwood floor repairing and some of the simple maintenance methods.
Scratches
Do not panic at the very sight of a scratch ruining the look of the beloved wood floor. Fix it in some simple steps.
- Minor scratches can be taken care of by rubbing off the area with sandpaper or steel wool.
- Sanding should be done only on the scratched zone of the floor and not all around the scratched area.
- Brush the sandpaper lightly around the scratched zone in order to camouflage the parts.
Stains
This is the worst that can happen to the adorable brown, clacker admiring wooden floor. A patch of stain somewhere on the wood floor can completely ruin the look and feel. Fix it ASAP before it catches anyone’s sight.
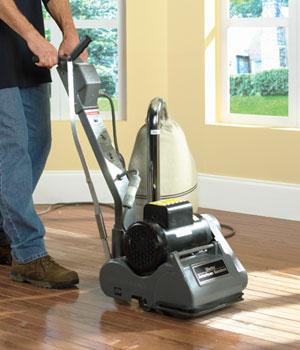
- The area should be sanded twice in turns using a vibrating sander.
- Use 100-grit sandpaper the first time and 150-grit one the next time.
- Vacuum clean the wood dust from the zone.
- Then the area needs to be wiped. In case of oil based stain, use mineral spirits. In case of latex based stain, use plain water.
- Lighten the darker stained zone on the wood flooring with oxalic acid solution or apply some bleach. Lightly sand the area post the liquid application.
Squeaks
The clackers on the tough wood floor admire the flooring. But squeaky ones can turn anyone neurotic.
- Find out the reason that is causing the wooden planks rub against each other and creating those squeaks.
- Smear some liquid or powdered graphite between the planks and then sweep the rest of the area.
- If the nails between the joists are the trouble creators, then better fix them then and there with a drilling machine or something. Or if any nail went missing then get it done. Choose the right size so that it does not pop up on the surface. Remember that “a stitch in time saves nine”.
Gaps
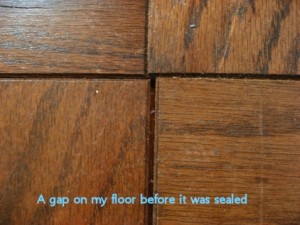
Gaps are a very common malady occurring with every welcomed season. Too much humidity during rains or too much heat during summers initiates the contraction and expansion of the wooden planks of the flooring.
- Weather shield or at least sun protected finishes can be used on the floorings in order to protect them from weather swings.
- Once it happens try to tighten up the hardwood floor and then brush the weather shield finish coat.
Cracks
The good, old wooden floor might develop some cracks on the planks after passing the test of a considerable time period.
- Fix the cracked parts together with some angled nails between them and bringing them closer. Apply some wood putty on the joint area to hide traces of the crack.
- If the crack is quite a big one then consider a replacement of the planks. Or else refinishing the total floor can also be a good idea.
Buckles or Warps
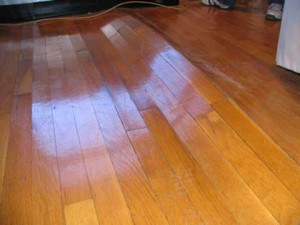
Heat and moisture are the main causes of buckling up in some parts of the wooden floors.
- Try sanding the area at a minor stage only to avoid the whole trouble and cost of replacing the planks.
- After vacuum cleaning the wood dust particles from the area around, apply some finishing coat in order to protect it from further buckling. The finishing will also help in camouflaging the part of the floor with the rest.
Cupping
More pressured parts of the wooden floor sinks a little than the surrounding area. This forms a shallow cup shape.
- Try to uplift the shrunken wooden planks from underneath the flooring.
- Tighten up the shrunken planks with the adjacent ones properly.
Water
All the water and excessive moisture related problems result in buckling, staining and even rotting of the deary hardwood flooring.
- Check the moisture level inside the house regularly.
- Sand the minor water affected area on the wooden floor.
- If the damage is in a very bad shape that somehow missed attention in minor stage, then replacement is the absolute solution.
Hardwood Floor Maintenance
Hardwood floor is in fact a very low maintenance flooring than others. Just a few regular steps of maintaining the floor can save all the post-damage repairing cost. Read below some of the simple ways of maintaining the tough, durable and gorgeous hardwood floor, that one already knows but just needs to be reminded of. So here we remind those do-s and don’t-s in an organized way.
- Sweep or vacuum clean the hardwood floor on a regular basis. This will prevent the minor and major possible scratches caused from dirt particles.
- Spread a beautiful carpet or rug on major part of the floor in order to prevent dirt particles spreading all around the shiny wood flooring. A gorgeous rug will compliment the wooden floor rather than hiding it.
- Clean any kind of spill on the floor immediately after it occurs. This will save the floor from water cleaning in order to remove the stain. In turn this whole initiative will save water damages on it.
- In case of any liquid spill over the floor, soak it immediately with toilet tissues. The roll soaks much faster than any kind of fabric.
- Try not to get innovative during the DIY of hardwood floor maintenance. Do not ideate own liquid mixtures for the cleaning. Plenty of brands bring out products that are specially designed for hardwood floor cleaning. Use only those products or plain tap water.
- Never ever use detergent mixed water or oil based soaps on the hardwood floor. These would surely damage the darling floor.
- Use carpet cuts-out into small pieces under legs of all furniture in order to prevent any frictional scratches on the floor.
- Use UV-resistant finishes on the floor to avoid fading the gloss due to sun rays.
- Most importantly, keep a hardwood repair kit always handy at home for anytime help.
These are some of the basics of hardwood floor repairing and maintenance. Try the repairing ways suggested and let us know how they worked to get the wood floor back to its full glamour.
We know how much these shiny, brown and elegant floors appeal to their owners. Anyone wants to share any more ideas of repairing the hardwood floors or regarding its maintenance? Be our guest to keep your views up front and enlighten our readers with more such ideas.


After looking over a handful of the articles on your web page, I truly like your way of blogging. I saved as a favorite it to my bookmark webpage list and will be checking back soon. Please visit my website as well and let me know what you think.|