Choosing the Right Paint Roller for the Job
If you have a painting project you’re about to tackle, choosing the right paint roller is just as important as choosing the right paint. It’ll be much easier to finish, cleanup will be quicker and the end result will look much better. If you want a smooth, gorgeous finish don’t let yourself get tempted by the first (or cheapest) paint roller options you come across. Whatever you do, never try to do your project with a foam roller!
Nap
Paint rollers have a variety of “nap” lengths. A good roller with a 3/8” nap is pretty versatile and will work well with most surfaces. If you’re going to use high-sheen paint on a new drywall surface, then consider a roller with shorter nap (1/4” or a 3/16” nap should work fine).
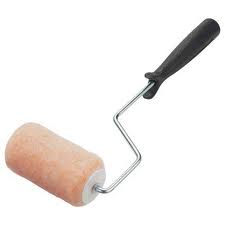
A general rule of thumb is the more textured the surface, the longer nap you should use. For instance, when painting concrete it’s common to use ¾” High capacity rollers that minimize splatter is what you want to find.
For a textured surface, you can try sheepskin or lamb-wool rollers. They won’t work well on smooth surfaces because hold a lot of paint. For smoother surfaces, try mohair or micro-fiber.
If you take the time to use a nail and poke holes into the inside rim of your paint can, then you will be able to avoid spills that are from the paint getting built up there. Near the edges of where the paint is going to be, you will want to tape off anything that is not going to have the new paint on it and use a brush for painting to make sure that you are getting the clean lines that you want. As for the middle area of the walls that you paint, you can use a roller to make the job go by easier.
Quality
Investing into quality paint rollers means you’ll get the look you want without all the headaches. Cheap, cardboard based rollers absorb water and paint quickly, so you don’t want to buy those… and that’s usually what you’ll find in cheap ‘value packs”.
Take proper care of your rollers and you’ll get plenty of use out of them over the coming years. If you’re just taking a small break, you can simply wet your roller, place a plastic bag over it and store it in cool space. It should be fine like this for up to a day.
Once you’re completely finished, clean the roller thoroughly (but carefully) with soap and warm water, and then allow it to air-dry.
Paint Pads?
Paint pads are preferred over rollers in some cases. While quality paint rollers minimize splatter, you have to expect some kind of splatter to happen eventually. Pads won’t, as they lie flat against the surface.
Another reason some people like pads is for corners. You can’t bring the roller all the way into the corner if the connecting wall isn’t being painted the same color. The side will easily brush up against it.
Proper usage
When you do your painting project by yourself, the last thing you are going to want on your newly painted wall is roller marks from painting. This is why you will paint in a W pattern with the roller. Overlap your W’s by first doing them vertically, then overlapping with horizontal ones. After the paint dries, take off your tape. If you are worried about it leaving marks or sticking too much, then just use a little hot air to loosen it.
Make sure that you have the right tools for the job that you are doing. If using latex based paint, then you should use synthetic brushes and rollers with it. If using an oil based paint, then you can use both natural and synthetic. Just know which are best for the paint that you are using.
Another part of knowing the right tools for the job has to do with the brushes that you use. If you are looking to get a large area of painting done, then you will want to use one of the brushes that is somewhere in the range of 3-4″ wide. This will take care of the larger area faster. Those that are called sash brushes are usually about an inch and a half in width and angled. These are great for smaller areas of detail. There is also what is known as the trim brush. This will give you a great edge at your tape line, and is usually about 3″ wide. Any tapered brush will have more paint being held than a flat one will.
Knowing your rollers. The basic rule here is that the rougher and more coarse the surface, the longer the nap of the roller should be. If you have been wondering the best way to know if you are getting a quality roller, then there is also an easy answer to that. Take the roller and give it a squeeze. 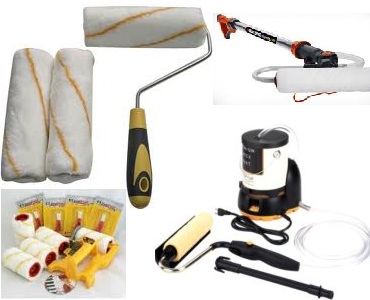 Those that quickly come back to their original shape are better than those that don’t. If you are needing to put more than one coat of paint on something, then you will have to be patient enough to let the first coat thoroughly dry before you put the next on. When it is time for a break, cover the unused paint and wrap all rollers and brushes with plastic wrap to keep them from drying.
When the time comes to clean your brushes, give them a soak first. This will make them easier to clean.
To do this more easily, you can hang the brushes over something that has water or solvent in it. Make sure that it is only enough to cover the bristles of the brush though. After it is finished soaking, you will rinse it then dry it. In order to make sure that all your bristles are straight after they dry, hand the brush back up. Have something under it to catch the drips.
Make sure that any area that you are going to paint is dry. If you are having high humidity or rain, then you will need to use a dehumidifier or an air conditioner, or just wait till it is dryer out. Make sure that you paint from top to bottom, so start with the ceiling.
The proper way to load the paint onto the brush is to put the bristles a third of the way down into the paint. That is a third of the bristles, not a third of the paint. When you are loading a roller, the proper way to do it is to dip it in a tray of paint and then roll it up the ramp of the tray. Do this until it is completely saturated with paint. Working in smaller areas at a time will make it easier on you. The sections should be about 4′ each.
There are times that your paint may leak through under your tape. This can be prevented rather easily. All you have to do is to use a plastic tapered tool to run quickly down the tape. This will cause friction and heat which will create a seal that the paint won’t cross.

i have read the acknowlegment of any types of paint but the best interior to design or decorate to use the best paint if u are looking in future to decorate your rooms and gardens and all that so that the best is green paint for reo cleans up and i have read the acknowlegment of any types of paint but the best interior to design or decorate to use the best paint if u are looking in future to decorate your rooms and gardens and all that so that the best is green paint for reo cleans up
Choosing The Right Paint Roller For The Job – http://t.co/gie2tRxA
This info is invaluable. Where can I find out more?|